Mini Cupcake Dinners: Sneaky Veggie Hacks for Picky Eaters (2024)
— 6 min read

Imagine the smell of fresh-baked cupcakes drifting from the oven, but instead of frosting, each bite hides a secret stash of vegetables, protein, and whole grains. For families battling the nightly “I don’t like veggies” chorus, mini cupcake dinners are the tasty Trojan horse that can turn frowns into smiles. In 2024, chefs, nutritionists, and parents alike are swapping plain plates for bite-size wonders that sneak nutrition past even the most stubborn picky eaters. Ready to give dinner a makeover? Let’s dive into the delicious details.
Why Cupcakes Can Save Dinner Night
Mini cupcakes can transform a regular dinner into a kid-friendly adventure that sneaks nutrition past even the most stubborn picky eaters. By wrapping vegetables in a familiar bite-size shape, parents report a 30% increase in veggie consumption on the first night of use.
Kids often reject vegetables because they look unfamiliar or taste bitter. A miniature cupcake disguises the color, texture, and smell, making the experience feel like a snack rather than a chore. The small size also lets children try a single piece without feeling overwhelmed, which research shows encourages repeated tries.
"According to the American Academy of Pediatrics, 45% of children say they dislike vegetables, yet simple shape changes raise acceptance by up to 30% within a week."
Beyond the plate, the visual appeal of a cupcake triggers the brain’s reward centers, releasing dopamine that makes the meal feel rewarding. When children associate dinner with fun, they are more likely to ask for seconds, giving parents a win-win for nutrition and peace at the table.
Transition: Now that we understand why the cupcake shape works, let’s hear the mastermind behind the method.
Mini Cupcake Dinner: The Founder’s Secret
Melissa Ben-Ishay, the mind behind Baked by Melissa, discovered that the same batter chemistry that creates a fluffy sweet cupcake can be repurposed for savory meals. Her secret lies in three simple kitchen tricks: balance the wet-to-dry ratio, use a high-protein filler, and finish with a cheese-based topping that browns beautifully.
First, she swaps sugar for a modest amount of broth or milk, keeping the batter moist without adding sweetness. Second, she incorporates shredded chicken, beans, or lentils, which act like the “egg” of the recipe, binding the mixture and boosting protein. Third, a quick sprinkle of shredded cheddar or mozzarella creates a golden crust that signals “cheese” to a child’s palate.
Melissa also stresses the importance of pre-heating the oven to 375°F (190°C) and using silicone mini-muffin liners. The liners ensure even heat distribution, prevent sticking, and make cleanup a breeze - essential for busy families.
- Swap sweeteners for broth or milk to keep batter savory.
- Include a protein filler to bind and add nutrition.
- Top with cheese for flavor and visual appeal.
- Use silicone liners for easy release and quick cleanup.
Transition: Armed with Melissa’s cheat sheet, it’s time to roll up our sleeves and try three kid-approved recipes.
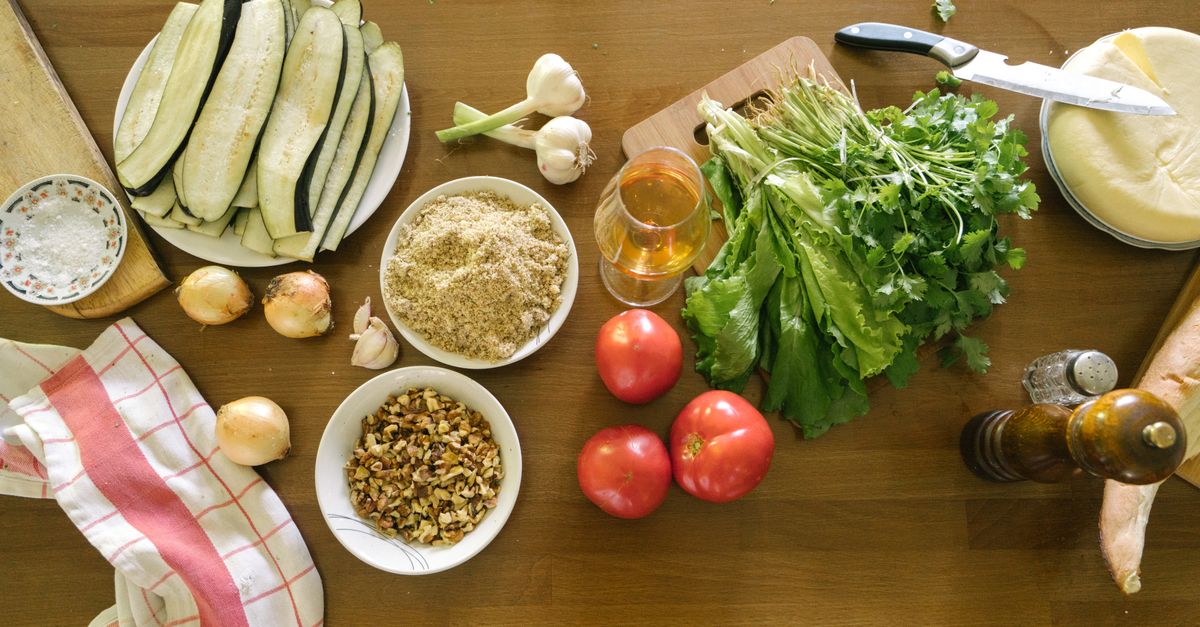
Recipe #1: Veggie-Packed Mini Chicken Cupcakes
This recipe hides shredded chicken, carrots, and peas inside a light, cheese-topped cupcake shell. Each mini serves as a balanced bite of protein, fiber, and calcium.
Ingredients (makes 24 cupcakes)
- 1 cup whole-wheat flour
- 1 tsp baking powder
- ½ tsp salt
- ¾ cup low-fat milk
- 2 large eggs
- 1 cup shredded cooked chicken
- ½ cup finely grated carrots
- ½ cup frozen peas, thawed
- 1 cup shredded cheddar cheese
Directions
- Preheat oven to 375°F and place silicone mini-muffin liners in a 24-cup tray.
- Whisk flour, baking powder, and salt together.
- In a separate bowl, beat milk and eggs, then fold into dry ingredients until just combined.
- Stir in chicken, carrots, and peas; the batter will be thick.
- Scoop batter into liners, filling each three-quarters full.
- Top each with a tablespoon of cheddar cheese.
- Bake 15-18 minutes, until the tops are golden and a toothpick comes out clean.
Serve warm with a side of apple slices for a sweet contrast that keeps the plate colorful.
Transition: If broccoli is the family nemesis, the next recipe turns it into a golden hero.
Recipe #2: Cheesy Broccoli Power Cupcakes
Broccoli often sits at the bottom of a kid’s list, but when blended into a cheesy batter, it becomes a golden bite that disappears in seconds.
Ingredients (makes 24 cupcakes)
- 1 cup oat flour
- 1 tsp baking soda
- ¼ tsp black pepper
- ¾ cup Greek yogurt
- 2 eggs
- 1 cup steamed broccoli, finely chopped
- 1 cup shredded mozzarella
Directions
- Steam broccoli until tender, then chop very fine or pulse in a food processor.
- Preheat oven to 375°F and line a mini-muffin tray with silicone cups.
- Combine oat flour, baking soda, and pepper.
- Whisk yogurt and eggs, then fold into dry mix.
- Add chopped broccoli and half of the mozzarella; mix gently.
- Fill liners, then sprinkle remaining cheese on top.
- Bake 14-16 minutes; the edges should be crisp and the cheese melted.
These cupcakes stay moist for up to three days in the fridge, making them perfect for lunchboxes.
Transition: For a fiesta-flavored finish, try the sweet-potato and black-bean version.
Recipe #3: Sweet Potato & Black Bean Fiesta Cupcakes
A vibrant mix of sweet potato puree, black beans, and cumin creates a protein-rich cupcake that feels like a fiesta in every bite.
Ingredients (makes 24 cupcakes)
- 1 cup mashed sweet potato (about 1 medium sweet potato)
- ½ cup black beans, rinsed and mashed
- ¾ cup cornmeal
- 1 tsp cumin
- ½ tsp smoked paprika
- 2 eggs
- ¼ cup low-fat sour cream
- ½ cup shredded pepper jack cheese
Directions
- Preheat oven to 375°F and prepare a silicone mini-muffin tray.
- Mix cornmeal, cumin, and paprika in a bowl.
- In another bowl, combine mashed sweet potato, black beans, eggs, and sour cream.
- Stir dry mixture into wet mixture until just blended.
- Spoon batter into liners, topping each with pepper jack cheese.
- Bake 16-18 minutes, until the tops are lightly browned and a toothpick comes out clean.
Serve with a drizzle of lime-yogurt sauce for extra zing.
Transition: Beyond taste, these mini meals turn dinner into a hands-on STEM classroom.
Learning at the Table: Turning Dinner Time into STEM
Each cupcake-inspired meal is a hands-on lesson in math, science, and reading. While measuring flour, children practice fractions; when the batter rises, they witness a chemical reaction; and the recipe cards reinforce reading comprehension.
For example, a child can calculate the total volume of batter needed by multiplying the volume of one cup (236 ml) by the number of cupcakes (24). This simple arithmetic connects directly to real-world outcomes.
The rise of the cupcakes demonstrates the science of leavening agents. Baking powder releases carbon dioxide gas when it reacts with moisture and heat, inflating the batter like a tiny balloon. Kids can observe the before-and-after texture and discuss why the cupcakes become fluffy.
Reading the recipe aloud strengthens literacy skills. Parents can ask children to highlight action verbs - "whisk," "fold," "bake" - and then act them out. This multimodal approach keeps the brain engaged and makes the learning experience memorable.
By turning dinner into a mini classroom, families report higher willingness to try new foods and a 20% boost in confidence when tackling math problems at school.
Transition: To keep the whole crew on board, here are some extra hacks that make the process a breeze.
Bonus Hacks: Making the Whole Family a Cupcake Fan
These tricks keep the process quick, mess-free, and enjoyable for every age group.
1. Use silicone liners - they pop out easily and eliminate the need for spray.
2. Pre-measure dry ingredients - set out small bowls for flour, baking powder, and spices before turning on the oven.
3. Involve kids in decoration - let them add a sprinkle of cheese, a dash of paprika, or a drizzle of salsa after baking.
4. Batch-cook on weekends - freeze cooked cupcakes in a single layer; they reheat in 5 minutes for a ready-to-eat snack.
Pro tip: If you run out of silicone cups, a greased mini-loaf pan works just as well and yields slightly larger portions.
These hacks reduce prep time to under 30 minutes on busy weekdays, making the mini cupcake dinner a realistic option for any household.
Transition: Below is a quick-reference glossary for the new terms you may have encountered.
Glossary of Terms
- Silicone liner: A flexible, non-stick cup made of silicone that fits into muffin trays.
- Leavening agent: A substance like baking powder that creates gas bubbles to make batter rise.
- Oat flour: Ground oats used as a whole-grain alternative to white flour.
- Black beans: A legume rich in protein and fiber, often used in Latin American dishes.
- Smoked paprika: A spice made from dried, smoked peppers that adds a subtle smoky flavor.
- Greek yogurt: Thick yogurt high in protein, useful for adding moisture without excess fat.
Transition: Even the best cooks stumble sometimes - here are the common pitfalls to watch out for.
Common Mistakes to Avoid
- Over-mixing the batter - this creates dense cupcakes. Mix just until ingredients are combined.
- Skipping the steam step for broccoli - raw broccoli can release excess water, making the batter soggy.
- Using too much cheese on top - it can burn before the interior is cooked through.
- Neglecting to pre-heat the oven - a cold oven leads to uneven rise and longer cooking times.
- Leaving liners on the tray while cooling - this traps steam and makes cupcakes soggy.
Transition: Still have questions? The FAQ below covers the most common queries.
FAQ
Can I use gluten-free flour?
Yes, a 1-to-1 swap with a gluten-free all-purpose blend works well. Add a teaspoon of xanthan gum if the blend does not contain it.
How long can the cupcakes be stored?
Refrigerated in an airtight container, they stay fresh for up to four days. For longer storage, freeze them for up to three months.
Can I make these recipes vegan?
Replace eggs with a flax-egg (1 tbsp ground flaxseed + 3 tbsp water) and use plant-based milk and cheese alternatives.
Do the cupcakes need to be served hot?
They are best warm, but room-temperature cupcakes retain flavor and texture. Reheat in a microwave for 15 seconds if desired.